Carving pumpkins has always been one of my favorite creative activities, and I want to share that experience with you. In this step-by-step guide on how to carve a pumpkin, I’ll walk you through the entire process—from choosing the perfect pumpkin to lighting up your finished creation. Whether this is your first time or you’re a carving enthusiast, I promise this is a fun, hands-on way to let your creativity shine. So grab your tools, follow along with me, and let’s carve a pumpkin that will impress everyone around you!
Materials You’ll Need
Pumpkin: Choose a medium to large pumpkin for more carving surface area.
Carving knife or pumpkin carving kit: These kits usually come with specialized tools for safer, cleaner cuts.
Spoon or scooper: A large metal spoon works well for scooping out the insides.
Marker or pen for sketching: Use a washable marker so you can adjust your design.
Candle or LED light: LED lights are safer and last longer than candles.
How to Carve a Pumpkin Step by Step
Step 1 Pick the Right Pumpkin
When learning how to carve a pumpkin step by step, the first crucial step is choosing the right pumpkin. Look for:
- A smooth surface, free from bruises and soft spots.
A medium to large size pumpkin for ample carving space.
A flat bottom so it stays upright.
The perfect pumpkin should feel firm to the touch and have a uniform shape, making it easier to carve. You can even visit a local pumpkin patch to pick the freshest pumpkins for your Halloween project.
Step 2: Clean and Prep the Pumpkin
Before you dive into carving, it’s important to prep your pumpkin:
- Clean the exterior of the pumpkin with a damp cloth to remove any dirt.
Place your pumpkin on a steady surface, like a table or kitchen counter, so it doesn’t roll around while you’re working.
Prepping your pumpkin properly will make the carving process smoother and less messy.
Step 3: Cut Off the Top
Now it’s time to remove the lid. Follow these steps:
- Use your carving knife or serrated blade to cut a circular opening around the stem of the pumpkin.
Make sure the opening is wide enough for your hand to reach inside easily.
Angle the knife inward toward the center as you cut. This will prevent the lid from falling inside when you place it back on later.
Alternatively, you can cut the hole from the bottom to keep the top intact for a cleaner look.
Step 4: Scoop Out the Inside
With your spoon or scooper, remove all the seeds and pulp from inside the pumpkin. Make sure the walls are scraped clean, leaving a hollow interior. This helps your pumpkin last longer and gives more room for the light.
Pro Tip: Save the seeds and roast them later with some seasoning for a tasty snack.
Step 5: Sketch Your Design
Here comes the fun part! Use a marker or pen to sketch out the design you want to carve. Some classic and creative pumpkin carving ideas include:

- Traditional spooky face: Triangle eyes, a square nose, and a jagged mouth.
Creative patterns: Stars, moons, or even words.
Pop culture characters: Try carving your favorite movie or cartoon character for a unique touch.
If you’re not confident in freehand drawing, you can find pumpkin carving stencils online and print them out to trace.
Step 6: Start Carving
Now that you’ve sketched your design, it’s time to start carving! Follow these steps for clean, precise cuts:
- Use a gentle sawing motion with your carving knife.
Start with the smaller areas, such as the eyes and nose, and work your way to the larger sections.
Take your time—rushing can lead to mistakes or even accidents.
For beginners, using a pumpkin carving kit with specialized tools can help make the process easier and safer.
Step 7: Add a Light
Once your pumpkin is carved, place a small candle or battery-operated LED light inside to bring your design to life. LED lights are recommended for safety, especially if you’re placing the pumpkin indoors or near children.
Pro Tip: If you want to make your pumpkin glow even brighter, rub the inside walls with petroleum jelly. This not only helps reflect the light but also preserves the freshness of your pumpkin.
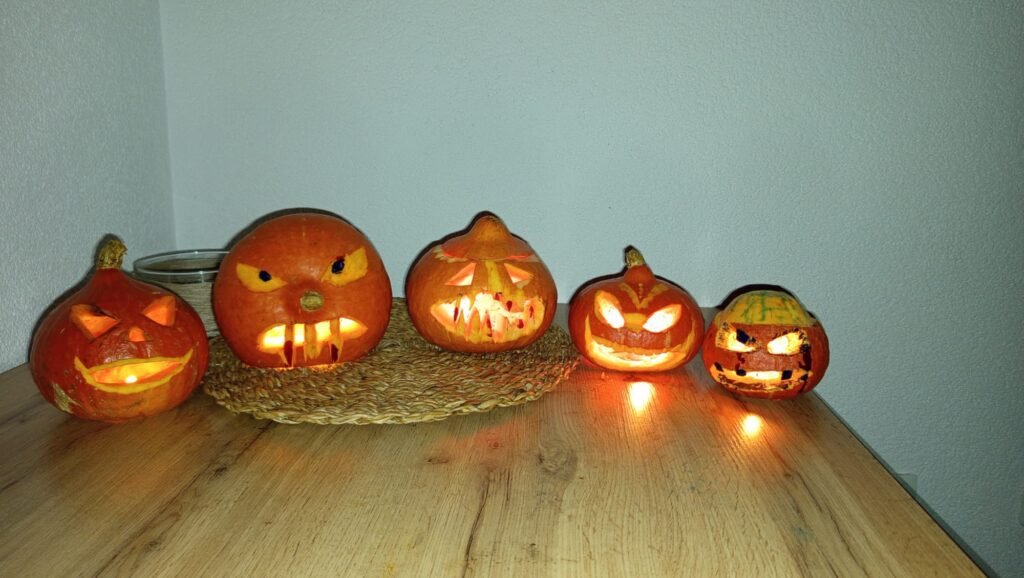
Step 8: Show It Off
After carving and lighting your pumpkin, it’s time to display it proudly! Here are a few ideas for where to showcase your Halloween creation:
- Porch or entryway: Welcome trick-or-treaters with your spooky masterpiece.
Windowsill: Let your glowing pumpkin be visible from the street.
Around the house: Arrange several carved pumpkins together for a themed Halloween display.
Your pumpkin will be the highlight of your Halloween décor, adding a fun and festive touch to the atmosphere.
Bonus Tips for Longer-Lasting Pumpkins
- Rub the carved edges with petroleum jelly to prevent them from drying out.
Spray the inside with a mixture of water and bleach to kill bacteria and slow down mold growth.
Store your pumpkin in a cool, dry place when not on display to extend its life.
Creative Pumpkin Carving Ideas
If you want to take your pumpkin carving to the next level, here are some fun and creative ideas:
Classic jack-o’-lantern: A traditional face with triangle eyes and a jagged mouth.
Animal designs: Try carving cats, owls, or bats for a nature-themed Halloween.
Scene carvings: Create intricate landscapes or haunted house scenes on your pumpkin for a stunning visual effect.
Conclusion
By following these simple steps, you now know exactly how to carve a pumpkin step by step and bring your Halloween décor to life. Carving pumpkins is not only a fun activity but also a great way to bond with family and friends while expressing your creativity. Whether you go for a traditional jack-o’-lantern or a more elaborate design, your pumpkin is sure to light up the night and add to the festive atmosphere.
Bonus Tip:
Want more creative pumpkin carving ideas? Watch this video for additional inspiration: YouTube Video.